前言:
利用IIS 8架設HTTPS ASP.NET網頁,如果使用Self-Signed Cert(免費)時會遇到的問題
就是進入網頁前要click入Continue to this website (not recommended)

Windows Server 2012 R2 + IIS 8
1. 使用PowerShell (Run as administrator) 創建Self Signed Cert

輸入:
New-SelfSignedCertificate -DnsName XX.XX.XX.XX -CertStoreLocation cert:\LocalMachine\My
DnsName可填Domain/IP
2. 使用mmc(簡單Search mmc可開啟),並加入File->Add Snap in內的Certificate

3. Copy 剛剛創建的Certificate


6. 之後在你的Site,Site Binding 套用HTTPS Certificate, Server Setting完成

7. User第一次仍要Click入Continue to this website

8. Click View Certificate 和Install Certificate


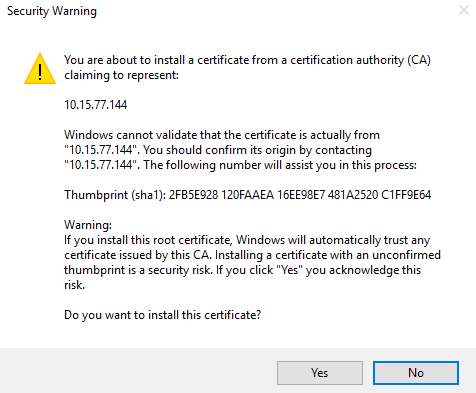
9. 選Current User及選Place all certificate in the following store 並選擇Trusted Root Certification Authorities

選Yes